Start with the application, not the part number
A drum brake wheel cylinder is a small hydraulic actuator with a narrow job: convert fluid pressure into linear force that pushes the brake shoes outward. Because it sits at the end of the hydraulic chain and inside a specific drum assembly, fit and compatibility failures usually show up as leaks, uneven braking, or a part that cannot be mounted without modification. The selection path below is built for buyers and engineers who need to match a wheel cylinder to a defined application, then verify it before committing to volume.
The core rule: define the operating envelope first, then choose the cylinder. A part that matches a reference photo can still be wrong on bore diameter, mounting offset, port thread, or bleeder orientation. Each of those is a hard constraint, not a preference.
Define the application envelope before comparing parts
Write down the following for the vehicle or axle in question. If any item is unknown, resolve it before requesting quotes; suppliers cannot reliably match a cylinder against an incomplete envelope.
- Vehicle or axle identity: make, model, year range, market variant, and whether the axle is front or rear. Market variants often carry different brake hardware.
- Drum brake configuration: single or dual wheel cylinder per side, shoe width, and drum diameter.
- Bore diameter: the internal cylinder bore that sets hydraulic force for a given line pressure. This is the single most consequential dimension.
- Mounting interface: bolt hole spacing, thread size and pitch, mounting flange thickness, and cylinder body offset relative to the backing plate.
- Hydraulic ports: inlet port thread and seat type, bleeder screw thread, and the orientation of both relative to the installed position.
- Environmental exposure: road salt, dust, moisture, and temperature range the cylinder will see in service.
This envelope becomes the checklist you compare every candidate against. It also becomes the basis for any custom wheel cylinder request, because custom work is only as good as the constraints supplied.
Bore diameter: the decision that changes braking balance
Hydraulic force at the wheel cylinder equals line pressure multiplied by the piston area, which is set by bore diameter. Increasing bore diameter raises force at the shoes for the same pedal input, but it also changes fluid displacement and front-to-rear balance. On a vehicle with a proportioning valve or a diagonally split circuit, a mismatched bore can shift balance enough to affect lockup behavior.
Practical rules for the selection path:
- Match the original bore diameter unless the brake system has been deliberately re-engineered and the change validated as a system.
- Do not substitute a larger bore to compensate for worn shoes, a leaking cylinder, or soft pedal feel. Those are symptoms, not sizing inputs.
- If the original bore is unavailable, treat any alternative as a system change requiring engineering review, not a drop-in replacement.
Bore size is also a manufacturing tolerance issue. A cylinder that is nominally the right bore but machined outside the intended tolerance can produce inconsistent pedal feel across a batch. Ask how bore dimensions are inspected and whether an inspection report is available.
Mounting and envelope fit: where most returns originate
Two cylinders can share a bore and port layout and still fail to install because of mounting geometry. Check these dimensions against the backing plate and drum:
| Check | What to measure | Failure if wrong |
|---|---|---|
| Bolt pattern | Hole spacing, hole diameter, thread size and pitch | Cylinder will not seat or fasteners cross-thread |
| Body offset | Distance from mounting face to cylinder centerline | Pistons misalign with shoe ends; uneven shoe wear |
| Overall length | Body length including boots and pistons at rest | Interference with drum or shoe retainer hardware |
| Bleeder orientation | Angle and clearance to backing plate and axle | Bleeder inaccessible or trapped air cannot be removed |
| Port position | Inlet location and angle relative to brake line routing | Line kinks, chafes, or cannot be connected without adapters |
Measure on the vehicle or on the original part, not from a catalog drawing alone. Catalog drawings are useful for shortlisting but are not a substitute for dimensional verification on the actual assembly.
Hydraulic integration: threads, seals, and fluid compatibility
The hydraulic interface is where small mismatches become safety issues. Confirm the following before installation:
- Inlet thread and seat type: metric or imperial, taper or flare, and the exact pitch. Adapters add joints, and every joint is a potential leak path.
- Bleeder screw: correct thread and seat, and accessible with the wheel installed or removed as the service procedure requires.
- Seal material: compatible with the brake fluid specified for the vehicle. DOT 3, DOT 4, and DOT 5.1 are glycol-based; DOT 5 is silicone-based and is not interchangeable. Seal compatibility must be confirmed for the fluid actually used.
- Internal cleanliness: machined bores should be free of swarf and preservative that could contaminate the fluid circuit.
Mixing seal materials or fluid types can cause swelling, softening, or leakage that appears only after weeks in service. If the vehicle's fluid specification is unknown, determine it before ordering.
Material and construction checks that affect service life
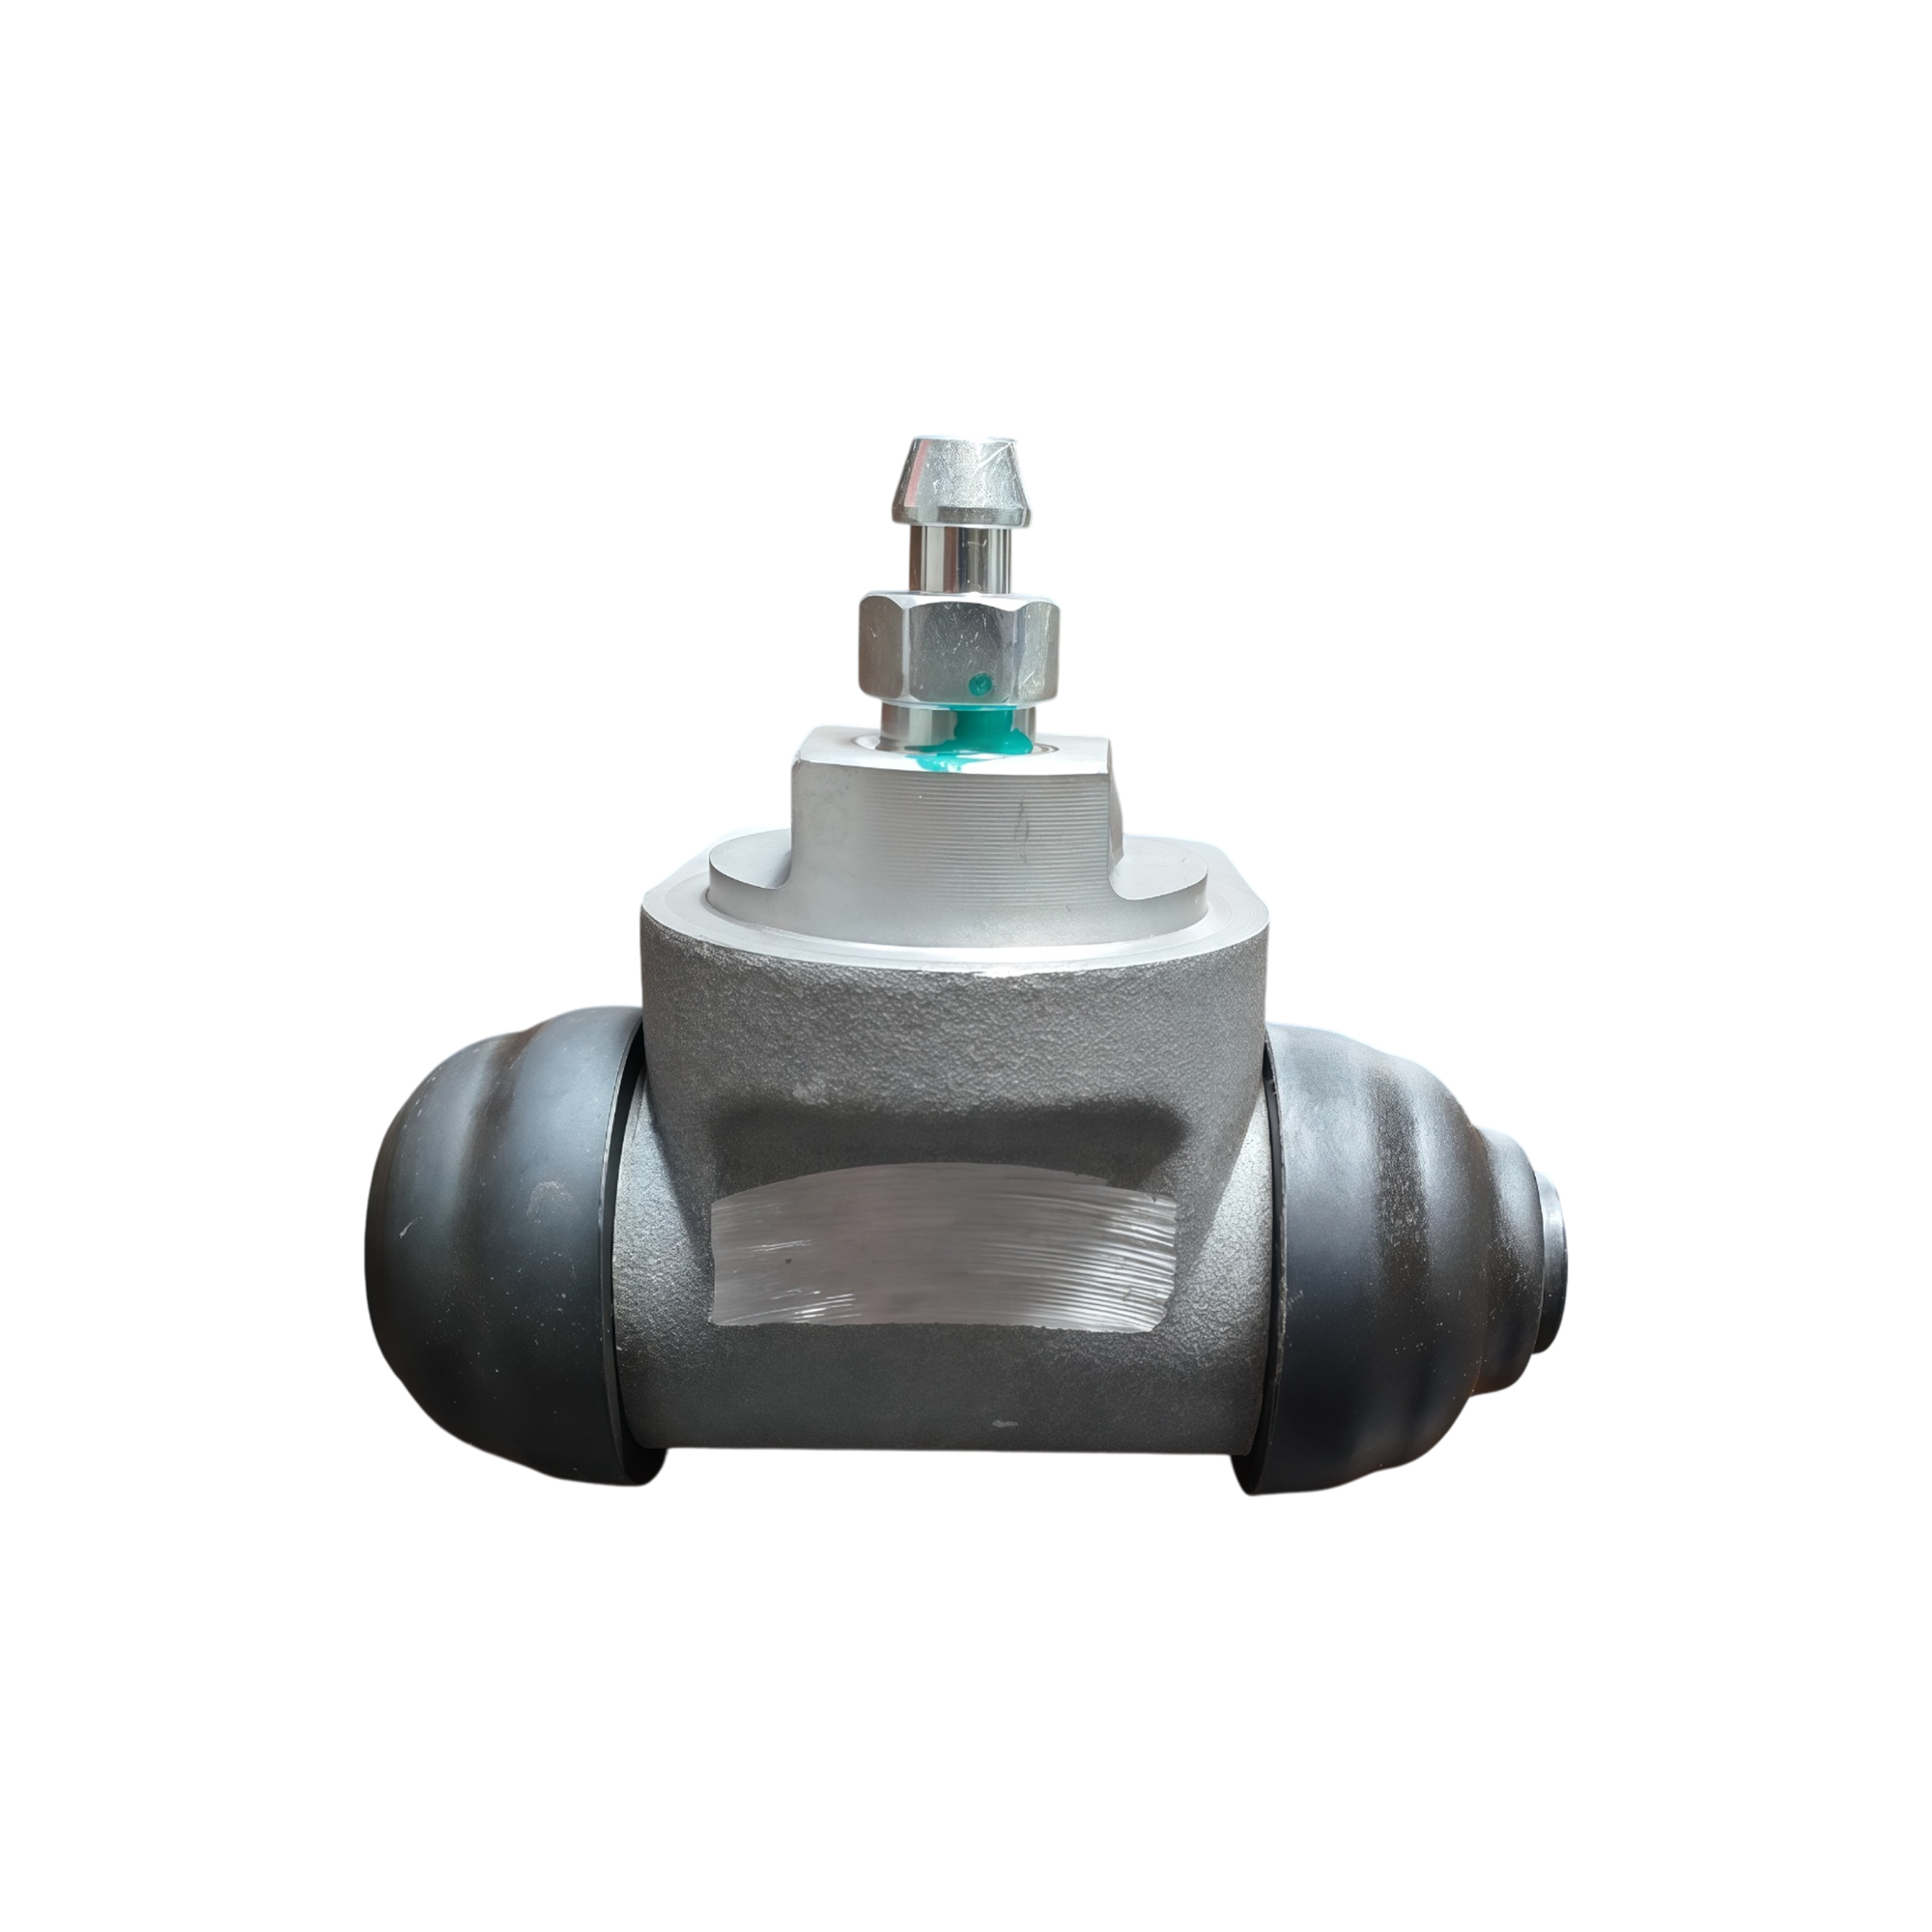
The supplied product evidence for this product family describes a cast housing with a machined bore area, rubber boots covering both ends of the cylinder, and a visible bleeder fitting. Those features point to the inspection points that matter:
- Bore surface finish: a machined bore should be consistent along its length; scoring or chatter marks can accelerate seal wear.
- Boot fit: boots should seat fully and seal against the body to exclude dust and moisture.
- Piston and seal fit: pistons should move freely without binding, and seals should sit square in their grooves.
- Housing integrity: cast housings should be free of porosity or cracks at threaded ports, where stress concentrates.
For aftermarket programs, batch-to-batch consistency matters as much as any single sample. Ask what inspection records accompany shipments and whether they can be provided on request.
Custom wheel cylinder requests: what to specify and what to expect
Custom production is appropriate when an original part is discontinued, when a low-volume vehicle or axle has no catalog coverage, or when an existing design needs a dimensional change for a specific application. A custom request should include:
- A dimensioned drawing or a physical sample with key dimensions marked.
- Bore diameter with tolerance, and the intended line pressure range.
- Mounting dimensions, port threads, and bleeder orientation.
- Fluid specification and expected operating environment.
- Expected order quantity and whether the part will be sold as a direct replacement or as part of a modified system.
Two limitations deserve emphasis. First, custom geometry cannot be validated by the supplier alone; the buyer must confirm fit on the actual assembly. Second, a custom cylinder is not automatically a performance upgrade. If the bore or hydraulic ratio changes, the brake system balance should be reviewed by someone qualified to assess it.
Verification steps before volume commitment
Use a staged verification path rather than approving a full order from a sample photo:
- Document review: compare the supplier's drawing against your application envelope, dimension by dimension.
- Sample fit check: install one cylinder on a representative assembly, confirm mounting, port access, bleeder access, and shoe contact.
- Hydraulic test: pressure-test the installed cylinder and check for leaks at the inlet and bleeder.
- Function check: confirm pedal feel and shoe actuation, and inspect for binding or uneven travel.
- Batch inspection: before volume release, review inspection records for bore dimensions, thread integrity, and boot seating.
Keep the sample and its measurements as the reference for the production batch. If the supplier changes tooling or process, re-verify against that reference.
Common failure modes and what they indicate
| Symptom | Likely cause | Verification step |
|---|---|---|
| Fluid leak at boot | Seal damage, bore scoring, or contaminated fluid | Inspect bore finish and fluid condition; replace cylinder if bore is scored |
| Soft or spongy pedal after install | Air trapped due to bleeder orientation or incomplete bleeding | Confirm bleeder is at the highest point; re-bleed per service procedure |
| Uneven shoe wear | Body offset or piston travel mismatch | Measure installed cylinder centerline against shoe ends |
| Cannot install without modification | Mounting or port geometry mismatch | Re-check envelope dimensions against drawing before any modification |
Modifying a cylinder to make it fit is a warning sign, not a solution. It can compromise the housing, the hydraulic seal, or the alignment of the pistons with the shoes.
Questions to put to a wheel cylinder supplier
- Can you supply a dimensioned drawing for the specific variant, not just a family photo?
- What bore tolerance is held, and how is it inspected?
- Which seal material is used, and is it compatible with the fluid specified for the vehicle?
- Are inspection reports available on request, and what do they cover?
- For custom work, what information do you need to quote, and how are drawing revisions controlled?
- How are batches identified so a production lot can be traced to its inspection record?
Clear answers to these questions matter more than a broad catalog. A supplier that can document dimensions and inspection is easier to integrate into a quality process than one that cannot.